Tuesday, December 29, 2009

Altered Thift Store Frame


Well, I found this beauty at the Thrift store for $1.92.  I knew exactly what I could do with it and was pretty excited with how well it turned out.  I forgot to take a picture of the before frame, but you can kind of get the idea of the ugly green is was before.

I first spray painted it this pretty aqua color.  It only needed a few coats.  I sanded the edges after it was really dry.  This is where my handy-dandy Cricut always comes into play.  I was hoping I had a cart that had a wreath on it, but I did not.  So, I had to make my own.  I found this cute branch and figured I could make my own wreath with a few of them cut out.  I cut the branches and the "B" out with black vinyl, used the AMAZING Cricut transfer tape for the first time, and placed it on the middle of the glass that already came with the frame.  (I forgot to mention that I just took the cardboard and the mat off the back of the frame.)  Last step is to place your glass back in the frame and add any 'bellies you like.  I just tied on a simple black ribbon.  This was my mom's Christmas present.  I am happy to report that it made it safely to Seattle :)


Wednesday, November 18, 2009

Book Pages Wreath

I found this cool idea will blog surfing.  I love coming across craft blogs.  I found this on Monday and made it Tuesday.  I was so excited how it turned out.  Here are the directions

I found the perfect spot to hang it after I took this picture, so I will have to update after I have it hung.

Block Letters

I have seen these blocks around for about 8 years now, and even made a small set for a Super Saturday about that long ago.  But I was re-inspired to make a new set after seeing Stephanie's.  And then, Shannon decided to make a large set for her family and it got my wheels spinning even more.  Here are some step-by-step pics to help.

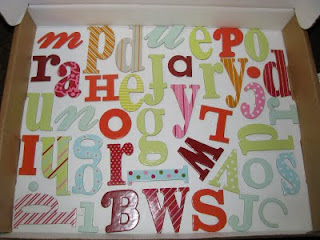
I had these chip board letters lying around that I got from the Target $ bins.  I spray painted them all red.


Number your 15 blocks 1-15 on the bottom.

I painted mine a latte' color and then

distressed the edges with brown paint


I laid out the letters on each block according to the cheat sheet I have (I can get you a copy if requested)
and then I decorated away.  All the other versions I have seen were just letters stamped on the wood, but I wanted it to be more of a vocal point on my mantle, so I added a little flair.

The final product!

Tuesday, October 20, 2009

Fabric Pumpkins


I decided to try my hand at a step-by-step craft post.  Here goes:
Supplies Needed:

*Warm and Natural Fabric-you can find this by the yard in the batting section     *Other fabric of choice
*Polyester Batting  *Sturdy, thick cording or thread  *Orange Paint  *Foam Paint Brush *Dry leaves & Stem


Cut out your fabric depending on what size you what your pumpkin.  The measurements for the one above is 22"x6".  Fold in half and sew the short end.

Take your thick cording and thread a needle.  Hand stitch only one open side(long side).  Make the stitch longer than normal so you can cinch it.

Cinch that side you just sewed...

...and then turn it inside-out.

Stuff with the batting.  Tip: There is no such thing as too much batting.  It should be over flowing.

Sew what is now the top like you did the bottom with longer stitches.


Pull it SUPER tight so that there is a small hole left.  Don't cut your cord yet.

Start wrapping your cord around the pumpkin to make the sections.  Wrap around once and then take your needle and stick it through the middle of the pumpkin.  Pull VERY tight.  Repeat this process to make as many sections as you want.  Tie off the cord when you are done.

Here is what it should look like at this point.

If you made it out of the warm & natural, you can leave it white to look like a gourd, or paint it orange to make it a pumpkin.  This will take a lot of paint because the fabric soaks it up.

Add your leaves and cut a small branch to make a stem.  Hot glue works great.

Here is another option for your pumpkins.  The bottom one was the easiest because it did not need to be painted.
Ok, go find some cute fall/Halloween fabric and make some pumpkins.  Let me know if you have any questions.

Cricut Shirts


Here is another fun project brought to you by the Cricut.  All you need is a plain shirt, some fabric paint, and freezer paper.
You cut a stencil out of the freezer paper with your cricut.  Iron it onto your shirt and use a flat foam brush to stencil with the fabric paint.  Let dry over-night and then peel away the freezer paper.  Voila'   Here are the 2 I have made so far.


Cake in a Box Birthday Card

I found this idea and just had to make it.  As always, it took longer than expected to make, but I am really excited about the end result.  Enjoy!


Friday, September 11, 2009

Misc. Household Objects Project


Well, I have finally gotten my craft stride back. For some reason I had no desire to craft/scrapbook for a good 3 months. Then, just like that, it hit me again and I have not stopped since! Here is a project that I found in a free coupon booklet I received in the mail. I got it on a Thursday and had it made by Sat. I was so excited to get the craft vibe back I couldn't stop until it was done.
Here is how I made it:
I went to the 2 local thrift stores and bought the misc bags of toys, kitchen supplies, jewerly, etc. It cost me maybe $10 for it all. I also picked up a few games that had lots of pieces. I then spray painted them all. Used a glue gun to glue them down on foam board, then framed them, minus the glass in the frame. I had laid out the pieces before I spray painted them and then took a picture so I could glue it down the same way. It was a very fun, creative project. Now, I just have to find a place to hang them.
Before Painted


After they are Painted

Thursday, April 30, 2009

Glass Tile Necklaces

I found this little project on another blog and just had to try it. It only cost about $2-$3 each to make, and that includes the chain. I found the idea here. I am addicted. I made 10, gave out 4 as gifts and have already ordered 10 more glass tiles. So cheap and easy!

Mother's Day Gift


The boys went up to Cleveland last Saturday to go to Ray's Mountain Bike Park. I thought it would be a perfect day for the girls to get together and make Mother's Day gifts. I found the idea here. I found the card idea here. I found the cutest cans at Wal-Mart in the fruit section. It was canned peaches before I altered it. I won't say what I am putting in the can just in case my mom looks at this by next Sunday. * Update, I ended up putting one of the glass tile necklaces in the can. Both mom's liked them.

Fold Out Scrapbook

I made this little beauty for my Sister's birthday. I found the directions here. It was so fun to make and pretty quick & easy too! I had to go to 3 different restaurants to find the square coasters. I got a couple weird looks when I asked, but finally found them at The Outback. I hope she likes it. (click on picture to enlarge)

Wednesday, March 18, 2009

St. Patty's Day Banner


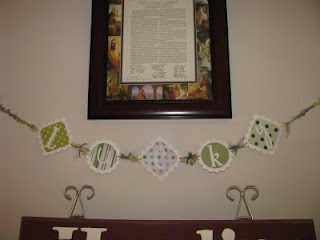
I made this a few weeks ago and should have posted it yesterday. Oh well. I am not going to post instructions on this one as it is pretty self-explanatory. Even though it is made with the Cricut, anyone can cut out similar shapes and add sticker letters or stencil letters onto them. Then just punch holes and string together with ribbon/fiber. You can also make these banners for any occasion-Birthday, Graduation, or any other holiday.

Let me know if you have any questions or further instructions are needed.

Vinyl Letter Tile


This is a very inexpensive ($2-$3) craft that adds flair to any room.

Supplies:
Tile from Home Depot or Lowe's ($1 each)
Either pre-cut vinyl letters or vinyl sheets to cut letters out of with a Cricut
Ribbons and other 'bellies
Hole Puncher

To Do:
There is a paper on the back of the tile, do not remove this as it is very sticky. You will have to trim the edges because the paper is usually a little bigger than the tile.
Find a quote or determine what you would like to out on your tile.
Arrange pre-cut letters/cut out letters from cricut
Stick on in whatever fashion suites you
Decorate with 'bellies (ribbons, buttons, etc)
Punch 2 holes in corners and add ribbon/fiber for hanging
You can also opt not to add the hanging ribbon and display with an easel

Enjoy and let me know if you have any questions.